You feel touched and honored and alive when you give to someone.
—Daphne Zuniga (Princess Vespa)
The PatternAgents Touch Widgets Library for Eagle is a schematic and layout library that provides the symbols and layouts for commonly used capacitive sensing control surface widgets, such as Buttons, Linear Sliders, Radial Sliders, X-Y Touchpads and more.
PatternAgents has been developing professional grade parts libraries for Eagle, and we have now included a library of Capacitive Touch Widgets to provide a number of different control surfaces for your projects. The PatternAgents EagleCAD Libraries are schematic and PCB layout libraries for various electronic components that you can use with the Eagle CAD program.
A number of our customers have complained to us how difficult it is to obtain or create good quality Capacitive Touch Widgets in Eagle, so we have spent the past week creating a new library to solve that problem. The PatternAgents Touch Widgets Library makes Capacitive Touch technology available to even the most novice Eagle users. Creating a good quality Capacitive Touch Widget takes both a understanding of capacitive sensing fundamentals, as well as an adept usage of the more advanced Eagle features, such as the tRestrict, bRestrict, vRestrict layers, hatched copper pours and other tricks. In this posting, we'll explain a little of what went into creating the PatternAgents Touch Widgets Library, and in the following posting, we'll give a step-by-step tutorial on how to use it.
Anatomy of a Capacitive Sensing Touch Widget
Capacitive Sensing buttons are deceptively simple, just a round polygon on the "Top" layer with a pad for a connection right?
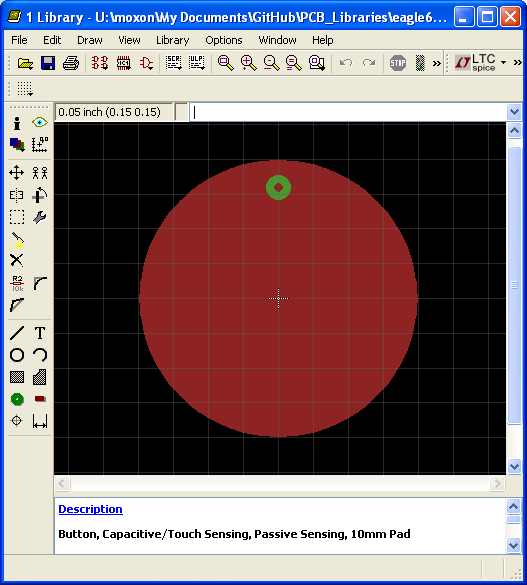
Well there are a number of other things to consider, like the spacing to any surrounding traces or top copper pours, or using the auto-router ; because you'd really like to use the autorouter, right? Well, if you use just this simple structure for your layout you will likely wind up with all kinds of problems, like vias in the middle of your Touch pad button, traces too close that cause interference and other problems. So, the first thing you want to do is create another circular polygon in the tRestrict (Top Restrict Layer) that encloses the pad to create a "keep away" region so other traces don't get routed too close and ruin the operation of your sensor.
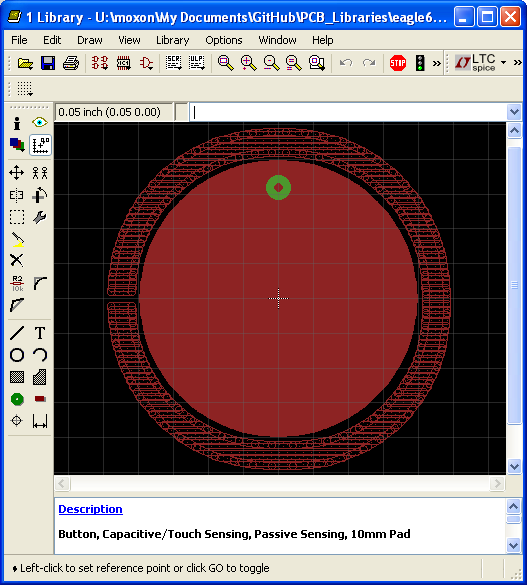
You will likely notice that the enclosing circle on the tRestrict layer is not really a closed circle is it? That is because of a limitation in Eagle whereby you can't have concentric polygons on the same layer without creating a "Dimension" DRC error (and it considers Top and Top Restrict to be the same "logical" layer). So, what is a part designer to do? Simply create your circular polygon with a small gap in it (it's on the left side in the above picture). You need to make sure that the gap is wide enough to avoid a "Dimension" DRC error, but small enough that Eagle won't try to thread a trace though the middle of it!
Okay, so we solved one problem, but the Eagle autorouter will still attempt to run a trace underneath on the "Bottom" layer, and even put a via on the edge of your sensor. So next, we create a new polygon on the vRestrict (Via Restrict) layer, to prevent any vias that might be added that would interfere with operation of our sensor.
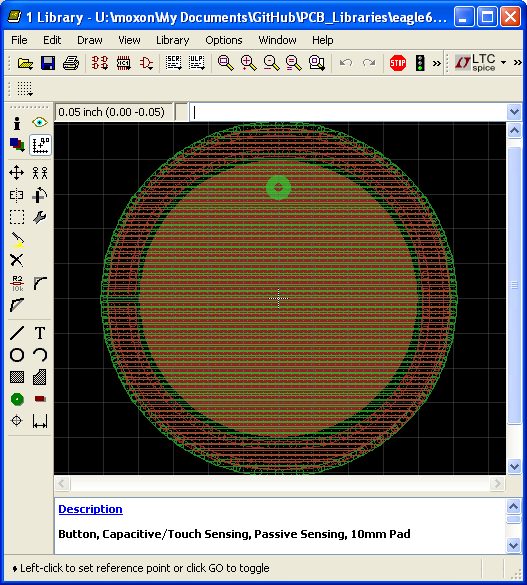
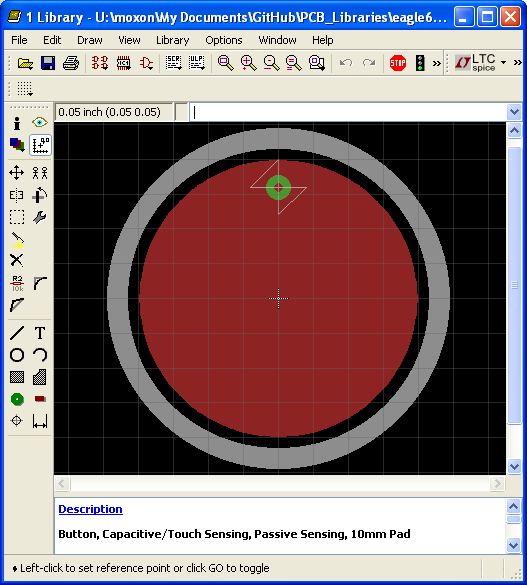
The vRestrict layer can be concentric without creating any "Dimension" DRC errors, so we create it the correct diameter to leave the required gap around our sensor element. This is really all you need for correct operation, but it would be nice to add a circle on the top silkscreen layer to give some visual indication that there is a Button here, right? (We'll turn off the t/vRestrict layters so you can see it better...)
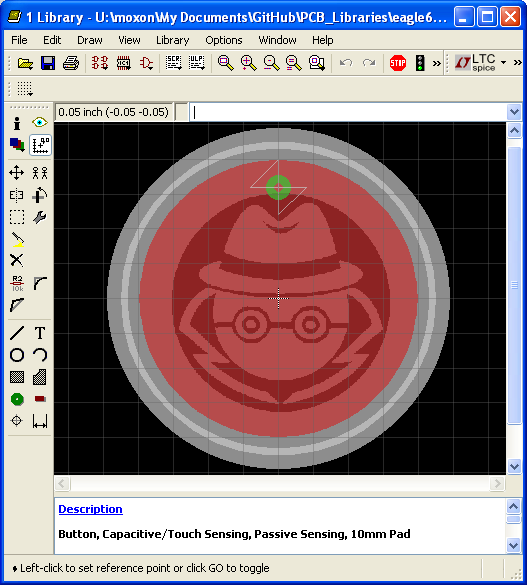
Because we would like to know where our buttons are when looking at the bottom side of the board, we'll put something fun (AgentZero to the rescue!) on the bottom silkscreen, where it won't interfere with the operation of the button.
And finally, here is what the complete Capacitive Sensing Button Widget looks like :
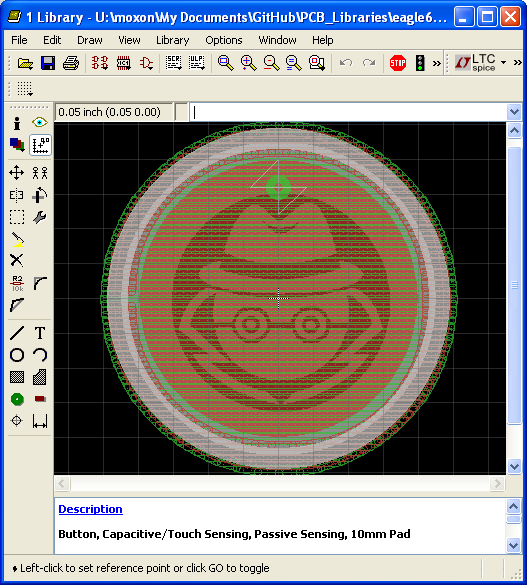
So those of you who are paying attention will likely ask, "Well, what about restricting routing on the Bottom Layer, using bRestrict?" When we place these components on our printed circuit boards (PCB's) we are going to create some top and bottom polygons for "Ground" (a.k.a. copper Ground pours) and we want that bottom copper pour under our button, so we don't really want to use a blanket "bRestrict" in the component/package for the sensor. Of course, that can always be added at the top level of your board itself, if the autorouter is mis-behavin'.
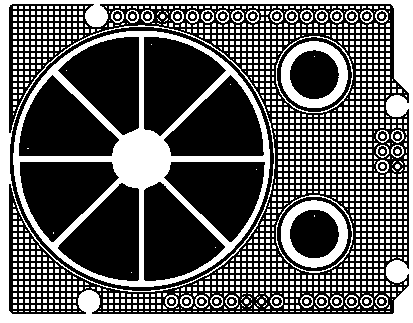
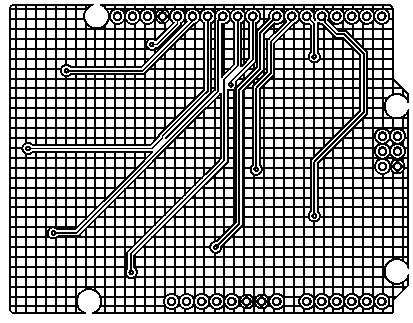
This is an example of what the top and bottom layers of the board would look like, rendered here in black and white so that you can see the ground plane hatch patterns (i.e. the copper pour) more easily. You will notice that the ground polygon pours are "hatched", and that the top layer pour and the bottom layer pour have different spacings.
Note Bene: When using the PatternAgents Touch Widgets Library for Eagle make sure that you use the PatternAgents.dru DRC control file for Eagle, as we have our minimum hole sizes set to 14mils. This makes the vias more like production vias, and also allows us to utilize 13.5mil magnet wire for fabricating manual vias when using two layer copper blanks (i.e. cut or milled PCB's) for testing. Or, if you have you own custom DRC file, than just set the minimum hole size to 14mils, to avoid getting any "Drill Size" DRC errors.
In the next article, we will cover the "Best Practices" for using the PatternAgents Touch Widgets Library for Eagle, and give a more detailed How-To on adding these components to your projects.
These libraries are updated frequently, and you should check for the latest version before generating your PCB's. Also note that some footprints are labeled "experimental" in these libraries, so be careful with those. You should always verify your design against the actual component footprints before fabrication by printing out a 1:1 plot.
For more information on Eagle, see CadSoft.
PatternAgents PCB_Libraries - Files and Downloads
Project Contents
- PatternAgents-TouchWidgets.lbr - Capacitive Sensing Touch Widgets for Buttons, Sliders, Dials, etc.
- PatternAgents-Beautify.lbr - Page Outlines, Power/Gnd Symbols
- PatternAgents-Logos.lbr - Logos for RoHs, ESD, etc.
- PatternAgents-Boards.lbr - PatternAgents PCB board outlines, Arduino and other small form factors
- PatternAgents-Cypress.lbr - Components from Cypress Semiconductor
- PatternAgents-NXP.lbr - Components from NXP (nee Philips)
- PatternAgents-TI-Tiva.lbr - Components from Texas Instruments
The PCB_Libraries Project by PatternAgents, LLC is available and licensed under a Creative Commons Attribution-ShareAlike 4.0 International License
